

Marcin Zbijowski developed an app to be used by the Codewise marketing team at conferences and tradeshows. In this presentation, he shows how the app development was facilitated using the Realm platform both for the iOS frontend and the AWS cloud backend.
Introduction
I want to show you how we used the Realm database and Realm mobile platform in one of our projects at Codewise. I did most of the development, which included an iOS app and a website for presenting data for preview.
We built this application for our marketing team because they wanted to have an application collect data on attendees. One of the main requirements of the app is to be able to update the data within the application in anticipation of bad or non-existent internet connection.
Realm
I decided to use Realm in light of the requirements. I never had the proper use case for Realm, but this application was a perfect match. Realm is offline first, it syncs as little as possible for parts that change, and does not require much bandwidth as a result. Realm is compatible with iOS, JavaScript which works with Node.js, React Native, in addition to Java for Android and .NET for Xamarin.
App Frontend
It’s easy to start development with Realm. You can start with the data model definition. This is a simplified version of what I had in my application:
class Attendee : Object {
	dynamic var firstName: String?
}

let attendee = Attendee()
attendee.firstName = "Marcin"

let realm = try! Realm()

try! realm.write {
	realm.add(attendee)
}
Each attendee has a first name. You create an object of that class, and you instantiate the Realm database. In this case, it’s a local instance. Data will be stored on the device, and it’s done in a write transaction.
To start synchronizing, you need to know where to store the data. Data synchronization is completed over the custom “realm protocol”. They also have realms, which is more secure.
private var authServerURL: URL {
	return URL(string: "https://\(self.syncServerURL)")!
}
private var realmServerURL: URL {
	return URL(string: "realm://\(self.syncServerURL):9080/~/\(self.realmName)")!
}
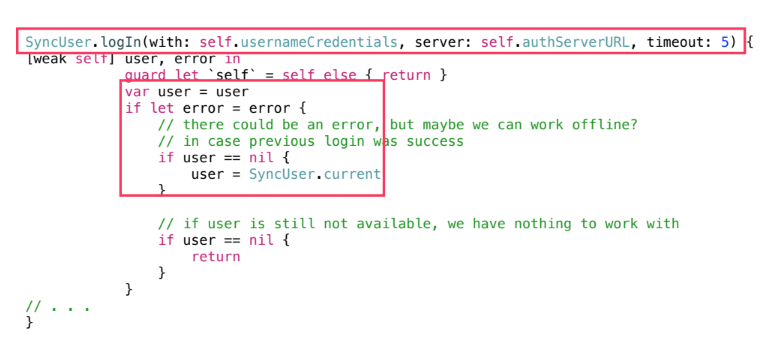
Lock a user to the Realm Object Server using your previously created URL. Then check for errors. If you find any - for example, you were not able to connect to the object server - you can use the previously logged in user:
 Realm takes care of checking network connections. If there is a network available, it will start synchronizing data automatically.
When you are successfully logged in, you can create the same configuration with that user and Realm path, and start using a Realm database. In my case, I was checking if there were new terms and conditions for the event, new questions for the contest, and other rules, such as how long attendees have to answer questions for the contest.
Here is an actual data model I wrote for the application, here is an Attendee:
class Attendee: Object {
	dynamic var dateAdded: Date = Date()
	dynamic var email: String?
	dynamic var firstName: String?
	dynamic var lastName: String?
	var knownProgrammingLanguages = List<ProgrammingLanguage>()
	var takenSurveys = List<TakenSurvey>()
}
You have first, last name, e-mail, and some relations to other models, like programming languages or taken surveys. The relationship is one to many; this is the same concept as in other database systems.
The TakenSurvey class looks like this:
class TakenSurvey: Object {
	dynamic var survey: Survey? = nil
	dynamic var startTime: Date = Date()
	dynamic var totalTime: Double = 0
	var answers = List<AnsweredQuestion>()
	var attendees = LinkingObjects<Attendee>(fromType: Attendee.self, property: "takenSurveys")
}
Here, because the contests are time based, there is an inverse relationship for attendees. Those who are familiar with the CoreData framework might remember this; it’s called an inverse relationship. This allows you to have a link between objects from both ends.
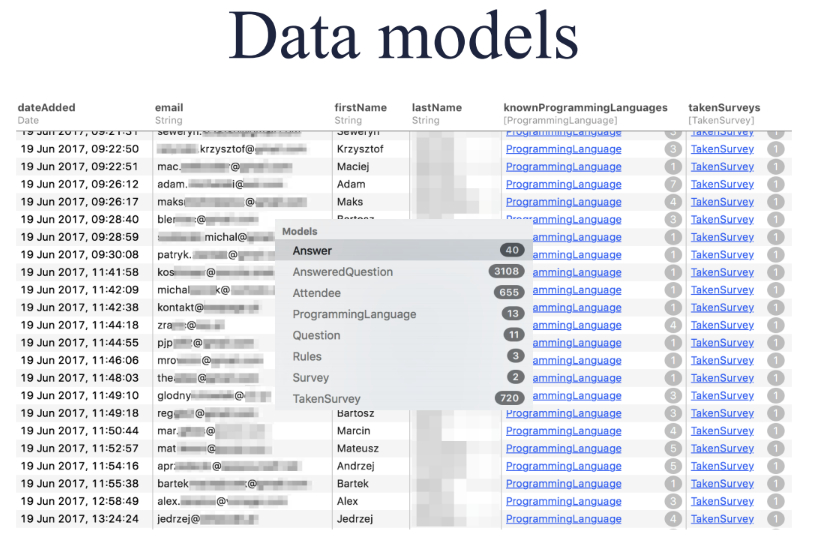
Realm also offers a mock application, allowing you to preview data. You connect the same way as you do in your application. You just enter your username, password, and choose the data. Enter the URL where data are stored. On the backend, you do not have to type int the models like in standard database systems, nor do you have to create a table. This is done for you when you start when the Realm database is created on the backend.
With the mock application, you can preview data and check relations between objects.
The remaining code in iOS is mostly UI. Users get presented with the following screen:
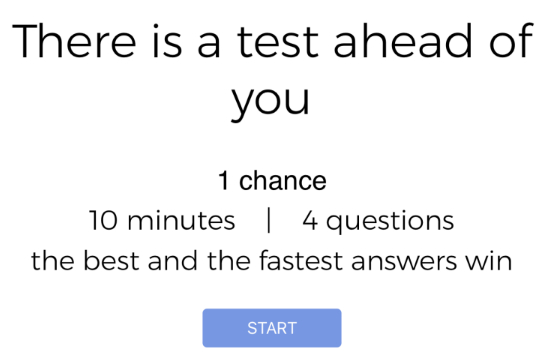
Usually, the screen is time-based. To populate the data in it, you pull data from Realm by entering the kind of objects you are looking for.
In this case, you filter it by ID (the primary key here), and it can be filtered by any property. Here is an example is from the DevOps conference:
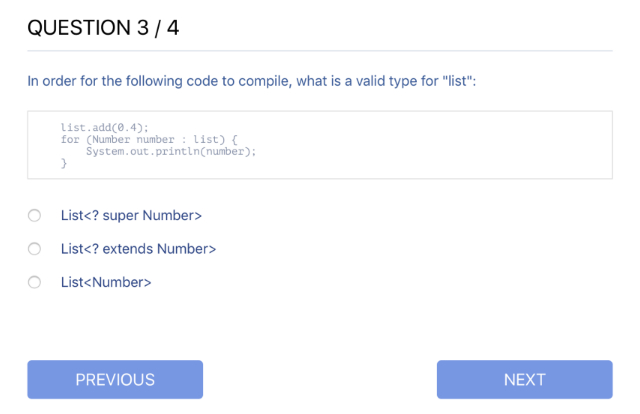
This is a simplified version of what I have within the application to present the question. The data is pulled and linked to the UI:
func present(question: Question) {
	guard let container = self.formContainer,
		let questionLabel = container.viewWithTag(QUESTION_TEXT_TAG)
	else { return }

	// . . .

	questionLabel.text = question.text

	if let code = question.code {
		// create and position label
	}

	for answer in question.possibleAnswers {
		let currentView = self.createRadioButton(for: answer, /*. . .*/)
		// . . .
	}
}
I’m just filling in the labels and flipping through possible answers.
The last part is some simple personnel form where people were entering the first name, last name, e-mail, and if they wanted, known technologies - known programming languages.
After is a form validation where I check if there is anything in the three required fields with a basic e-mail validation:
func save() -> Bool {
	// . . .
	let isValid = self.validateForm(container: container)
	if isValid {
		let attendee = self.createAttendee(from: container)
		// . . .
		queue.async {
			try! realm.write {
				realm.add(attendee)
			}
		}
		self.clearForm(container: container)
	} else {
		let alert = UIAlertController(title: nil, message: NSLocalizedString("Please enter your name, surname and email", comment: ""), preferredStyle: .alert)
		// . . .
		presenter?.present(alert, animated: true)
		return false
	}
	RealmSyncHandler.sharedInstance.startUploadSync()
	return true
}
The attendee object is created after validation. So if somebody dropped off during the process, I don’t have any garbage in the database. I create the object, and I have all the necessary fields I need.
Backend Realm Object Server
On the backend, I installed the Realm object server, started an Ubuntu instance on Amazon Cloud, and ran a couple commands on the command line with a few changes in the default configuration.
I also needed to fulfill transport security requirements because our communications with the API on iOS had to be done over HTTPS. One of my colleagues suggested Caddy server.
Data Preview
Lastly, there is data preview. At first, I thought I would use server-side Swift, and run Swift apps on Linux. But Realm doesn’t work on Linux yet, this is because the core functionality of Realm highly depends on Objective-C runtime integration on Apple platforms. Therefore, it’s not that easy to rewrite the core functionality in Swift, because Swift doesn’t offer such functionalities.
Because Realm does not work on Linux, I decided to use JavaScript. Realm offers an SDK for Node.js, and for React native. For data preview, I needed to show the contest results so the marketing team knew who won. They wanted to quickly check how many attendees went through our stand. They also wanted to export attendees’ data including the e-mails to a CSV file.
I had to rewrite my data models, and translate my code from Swift to JavaScript, but as you can see, they are not that much different. The Attendee in JavaScript looks the same as in Swift:
module.exports = {
	name: 'Attendee',
	properties: {
		dateAdded: { type: 'date', default: new Date()},
		email: { type: 'string', optional: true},
		firstName: { type: 'string', optional: true},
		lastName: { type: 'string', optional: true},
		knownProgrammingLanguages: { type: 'list', objectType: 'ProgrammingLanguage' },
		takenSurveys: { type: 'list', objectType: 'TakenSurvey' }
	}
...
TakenSurvey:
module.exports = {
	name: 'TakenSurvey',
	properties: {
		survey: { type: 'Survey' },
		totalTime: { type: 'double'},
		answers: {type: 'list', objectType: 'AnsweredQuestion'}
	}
...
Because of time pressure, we used Bootstrap, and that was enough for this project. Here is the DevOps conference survey example:
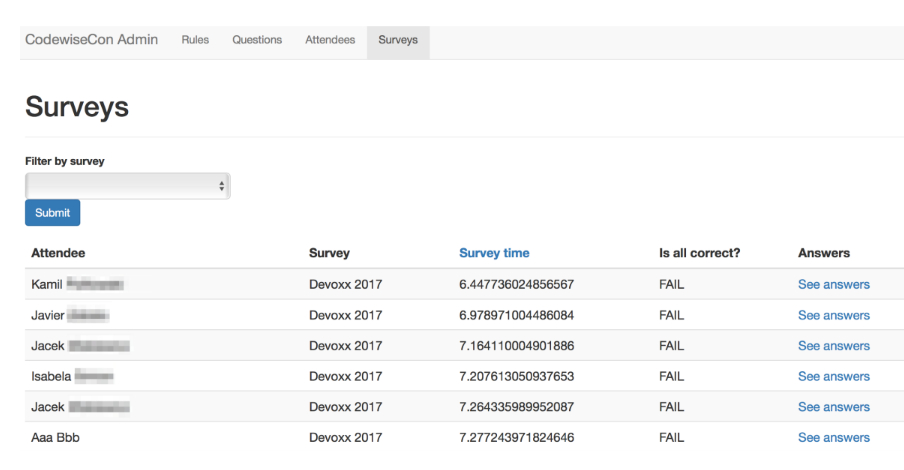
We used this application at a couple events, all varying in size. There was never issues collecting data, or synchronizing them with the available networks.
About the content
This talk was delivered live in October 2017 at Mobilization. The video was transcribed by Realm and is published here with the permission of the conference organizers and speakers.