Want to implement a map interface in your app? Don’t settle for just a basic boring MKMapView…
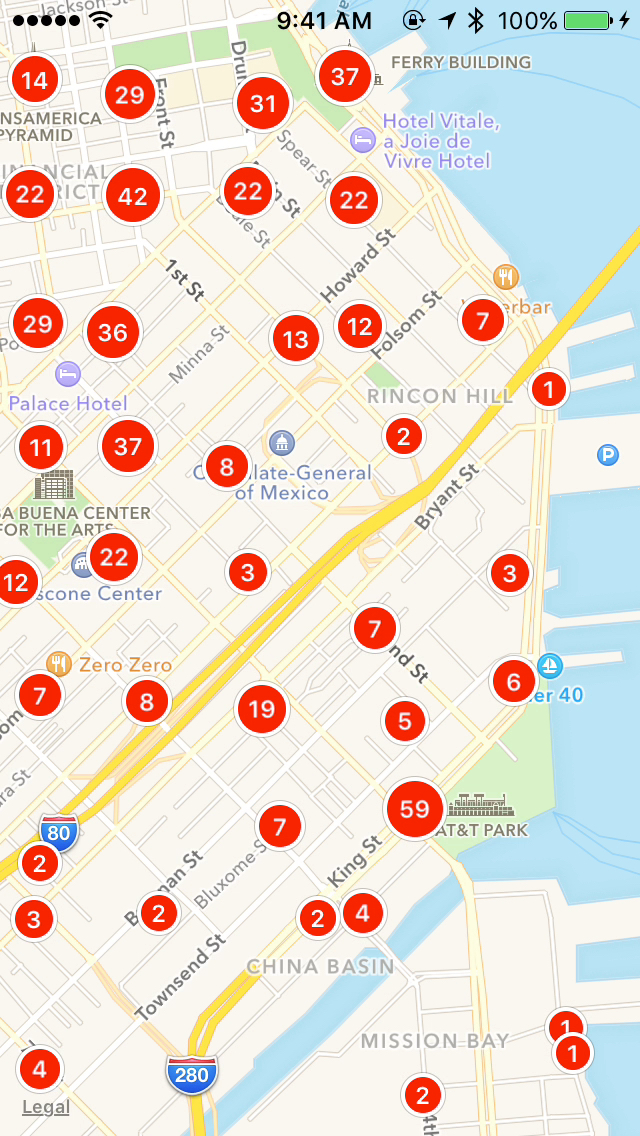
Instead this tutorial will show you how to build a dynamic map that offers automatic real-time fetching when the map moves and clustering of annotations:
Overview
Traditionally, building a dynamic map like the one above meant creating your own specialized data structure, such as a quad tree. This is difficult to build and comes with other drawbacks such as memory management and re-indexing to changes. Instead, Realm allows us to skip all that complexity and take advantage of its incredible speed.
All that is needed is to store your location data in Realm and utilize RealmMapView in the same way you would use MKMapView.
Let’s get started, but if you want to jump to the end product, you can see the final code on GitHub here.
If you are looking for an Objective-C version, you can check out the tutorial for ABFRealmMapView, which has an identical API.
Tutorial
Create a new Xcode project, using the “Single View Application” template. Be sure “Language” is set to Swift, and that “Use Core Data” is unchecked.
RealmMapView is available through CocoaPods. (If you don’t have CocoaPods installed, follow their instructions before continuing.) In your terminal, cd to the project folder you just created, and open the Podfile (if you don’t have a Podfile, perform pod init in the folder first). To install RealmMapView, simply add the following lines to the Podfile you just created:
use_frameworks!

pod 'RealmMapView'

# Map data set
pod 'RealmSwiftSFRestaurantData'
In your terminal, run pod install. This will also install Realm automatically! (If this is your first time using CocoaPods, this could take a while. Future uses will be much faster.)
When it’s done, you’ll need to close the Xcode window and open the XCWORKSPACE file that CocoaPods created, so that you can use the classes inside the pods.
In main.storyboard, add an MKMapView to the view controller, and change its “Class” (in the Identity Inspector, at the top right) to RealmMapView (which is a subclass of MKMapView).
Now we need some data to put on the map! For this tutorial, we’ll be using some restaurant data. Recall, we already installed via CocoaPods RealmSwiftSFRestaurantData. This includes the locations of all the restaurants in the city of San Francisco.
To make RealmMapView aware of which data to display, you need to give it the Realm object name and key paths for latitude, longitude, and annotation view title and subtitle. You can change these properties in Interface Builder, as shown in the image below (you can also set the properties programmatically too).
| Property | Value |
|---|---|
| Entity Name | ABFRestaurantObject |
| Latitude Key Path | latitude |
| Longitude Key Path | longitude |
| Title Key Path | name |
| Subtitle Key Path | phoneNumber |
Now for this data set we need to do a bit more configuration since the data is stored in a secondary Realm (rather than the default Realm).
In ViewController.m, add this header to the top of the file:
import RealmSwift
import RealmSwiftSFRestaurantData
import RealmMapView
Add an IBOutlet for the RealmMapView from your storyboard to this view controller.
As mentioned above, we need to configure RealmMapView to use the path to the separate Realm file with the restaurant data. Luckily, RealmSwiftSFRestaurantData makes this easy by supplying a function to retrieve the path.
In the same file, add the following lines after super.viewDidLoad():
var config = Realm.Configuration.defaultConfiguration
config.path = ABFRestaurantScoresPath()
self.mapView.realmConfiguration = config
When that’s done, your ViewController.swift file should look like this:
import UIKit
import MapKit
import RealmSwift
import RealmSwiftSFRestaurantData

class ViewController: UIViewController {

    @IBOutlet var mapView: RealmMapView!

    override func viewDidLoad() {
        super.viewDidLoad()

        var config = Realm.Configuration.defaultConfiguration
        config.path = ABFRestaurantScoresPath()
        self.mapView.realmConfiguration = config
    }
}
That’s it! Run your app and enjoy the restaurants of San Francisco.
Extras
Want to add a little more functionality to understand some more of the capabilities RealmMapView offers?
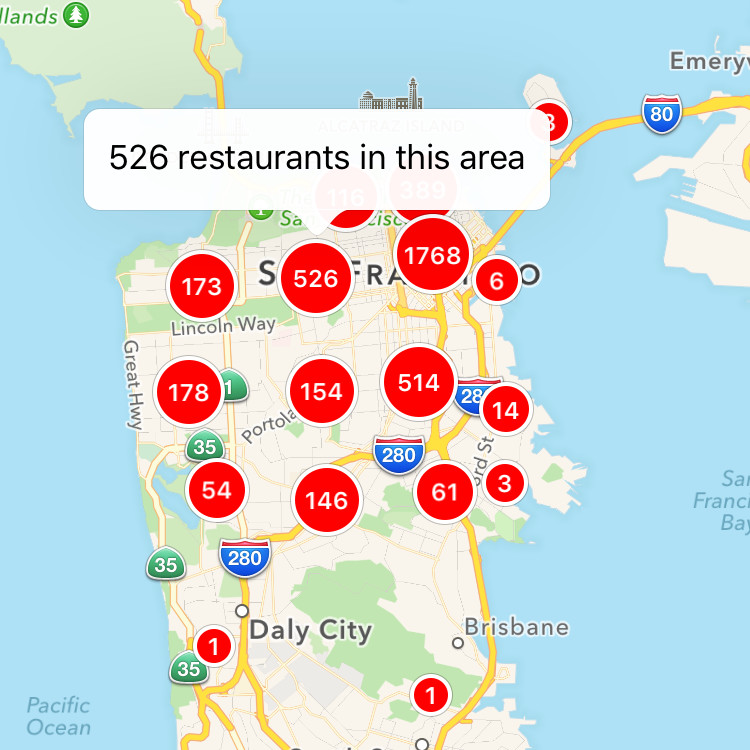
If you notice, by default, clicking on a cluster annotation reveals a callout that says “X objects in this area”. Our example, though is displaying restaurants, so it would be great if this read “X restaurants in this area”.
RealmMapView offers this functionality from its internal fetchedResultsController, via a property: clusterTitleFormatString.
This property accepts a string that represents the annotation callout’s title string. To insert the number of items, the string must use the $OBJECTSCOUNT variable somewhere in the string which will be replaced by the object count.
So to use this in the example just add this line in ViewController.swift in viewDidLoad():
self.mapView.fetchedResultsController.clusterTitleFormatString = "$OBJECTSCOUNT restaurants in this area"
Now run your app and click on a cluster to see the change in the title!
The other feature that you will likely want is the ability to retrieve the object or in the case of a cluster, objects, that are associated with the annotation.
MKMapView offers a delegate callback whenever a user selects an annotation view via:
func mapView(mapView: MKMapView, didSelectAnnotationView view: MKAnnotationView)
Let’s first get this setup, then we can see how to retrieve the object in the function. Go back to ViewController.swift and add this line in viewDidLoad():
self.mapView.delegate = self
This sets the view controller as the delegate, but now we need to actually conform to the protocol. This is easy to do via a class extension:
extension ViewController: MKMapViewDelegate {
    func mapView(mapView: MKMapView, didSelectAnnotationView view: MKAnnotationView) {
        if let safeObjects = ABFClusterAnnotationView.safeObjectsForClusterAnnotationView(view) {

          if let firstObjectName = safeObjects.first?.toObject(ABFRestaurantObject).name {
              print("First Object: \(firstObjectName)")
          }
        }
    }
}
In the code sample above, this demonstrates how you can retrieve the objects tied to the annotation. ABFClusterAnnotationView as a class method: safeObjectsForClusterAnnotationView which returns an array of ABFLocationSafeRealmObjects. These objects are intermediate representations of the original Realm object, and are thread-safe. To convert the safe object back into the original object, just call toObject(Object.Type). In the example above, we retrieve the first safe object and convert it back into a ABFRestaurantObject.
About the content
This content has been published here with the express permission of the author.


