Android Weekly는 매주 발행되는 안드로이드 뉴스레터입니다. 영어 기사를 정독할 시간이 없는 분을 위해 핵심 꼭지를 요약했습니다.
주간 안드로이드 뉴스를 요약해 드립니다. Android Weekly 207 원문도 읽어보세요.
새로운 레이아웃: ConstraintLayout
얼마 전 Google I/O에서 새롭게 발표된 내용으로 새로운 레이아웃인 ‘ConstraintLayout’을 소개합니다. 이 레이아웃의 목적과 특징, 사용 방법을 다루는 튜토리얼을 요약 정리해드립니다. ConstraintLayout에 대한 자세한 내용은 Constraint 레이아웃 알아보기(Exploring the new Android ConstraintLayout)와 ConstraintLayout 기초 및 안드로이드 스튜디오의 새로운 레이아웃 빌더 (ConstraintLayout 101 & the new Layout Builder in Android Studio)를 참고하세요.
- 세팅
- 안드로이드 스튜디오(2.2) 프리뷰 다운로드
- 디펜던시 추가
compile
     'com.android.support.constraint:constraint-layout:1.0.0-alpha1'
- 컨스트레인 레이아웃이란? 강력해진 RelativeLayout을 생각해보세요~ toRightOf, toLeftOf와 같이 위치 속성을 주면서 어떻게 위젯이 정렬될 것인지도 규정하는 것이 바로 컨스트레인(constraint)입니다. 새로운 ConstraintLayout을 사용하면 레이아웃 안의 다른 뷰들의 관계에 따라 위치를 한정지어 자식 뷰들을 배치시킬 수 있습니다.
“ConstraintLayout으로 중첩된 뷰를 줄여 성능 향상 가능!”
-
RelativeLayout보다 더 유연한 위치 속성
- RelativeLayout 뷰 위치 속성
- layout_toRightOf
- layout_toLeftOf
- layout_toTopOf
- layout_toBottomOf
- ConstraintLayout 뷰 위치 속성
- layout_constraintTop_toTopOf
- layout_constraintTop_toBottomOf
- layout_constraintBottom_toTopOf
- layout_constraintBottom_toBottomOf
- layout_constraintLeft_toTopOf
- layout_constraintLeft_toBottomOf
- layout_constraintLeft_toLeftOf
- layout_constraintLeft_toRightOf
- layout_constraintRight_toTopOf
- layout_constraintRight_toBottomOf
- layout_constraintRight_toLeftOf
- layout_constraintRight_toRightOf
- left, right 정렬에 대해 start, end속성 지원
- RelativeLayout 뷰 위치 속성
-
Constraint 조작하기
-
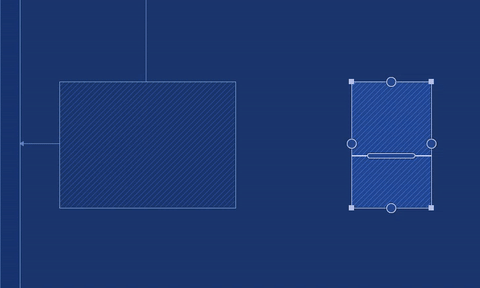
Resize: 코너의 사각형을 잡고 드래그
-
Side Constraint Handle: 사각현 변의 동그라미
 또는 XML 레이아웃에 속성을 줄 수 있습니다.
-

 또는 XML 레이아웃에 속성을 줄 수 있습니다.
app:layout_constraintRight_toRightOf="@+id/text_like_count"
- Baseline Constraint Handle

app:layout_constraintBaseline_toBaselineOf="@+id/text_title"
- Vertical Bias

app:layout_constraintVertical_bias="0.5"
- Horizontal Bias


app:layout_constraintHorizontal_bias="0.5"
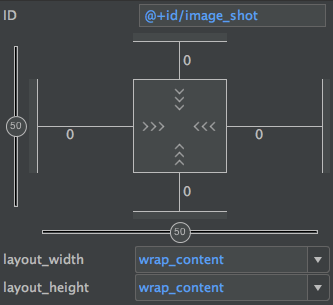
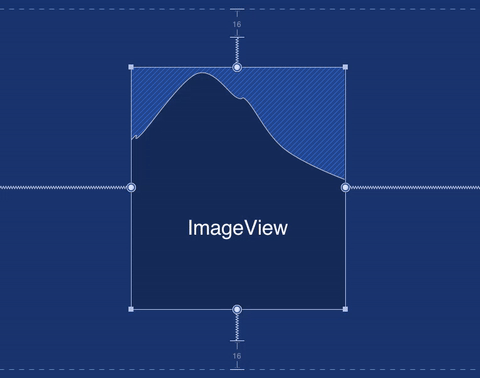
- 뷰 사이징
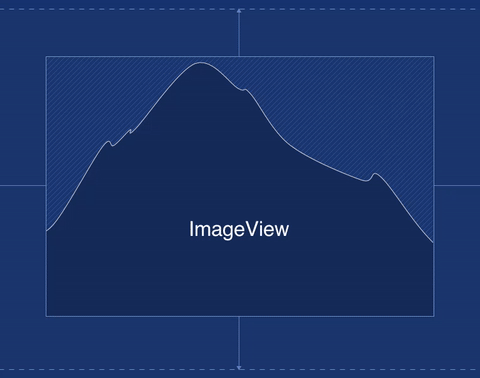
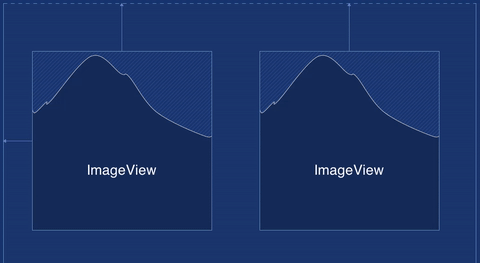
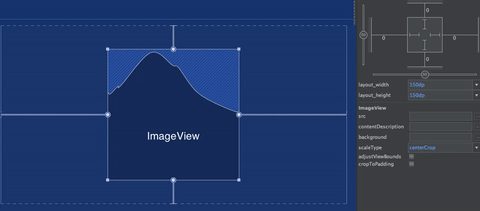
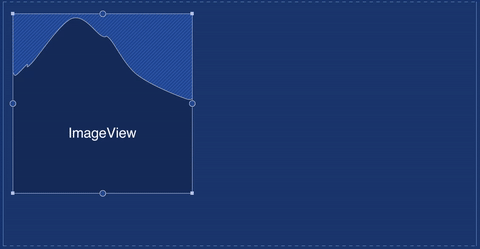
레이아웃 에디터의 속성 섹션을 보면 선택된 뷰에 해당하는 사이즈 constraint를 볼 수 있습니다. 사각형 안의 선이 실제 뷰가 레이아웃에서 어떻게 보여지는지 나타내는 것입니다.
- match_parent: 사각형 안의 구불구불한 선은 뷰가 match_parent로 제시될 것이라는 의미
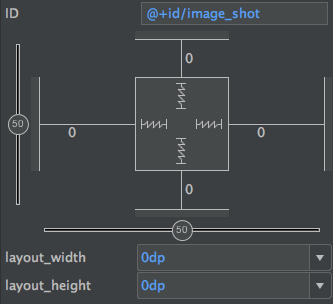
- wrap_content: 필요한 만큼만 크기를 가질 것이라는 의미
- 지정된 고정 크기
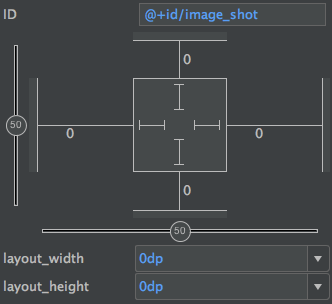
- match_parent: 사각형 안의 구불구불한 선은 뷰가 match_parent로 제시될 것이라는 의미
-
자동 연결(auto-connect) 레이아웃 에디터에서 뷰를 위치시키면 자동으로 constraint를 계산해줍니다~ 편리하겠죠!
-
수동으로 constraint주기 필요하다면 자동 연결을 해제하고 직접 제한시킬 수 있습니다. 자동으로 생성되는 불필요한 constraint를 지우는데 시간을 허비하지 않을 수 있고 더 많은 컨트롤을 할 수 있습니다.
-
Inference 모든 다른 위젯 간 constraint를 만들어줍니다. auto connect처럼 동작하지만 차이점은 선택된 위젯뿐만이 아닌 전체 뷰에 대해 동작한다는 것입니다. 전구모양 버튼을 사용해보세요!
- constraint 제거
- 한개 제거: 앵커 포인트를 하나 선택해 지우기
- 전체 제거: 뷰를 선택한 후 왼쪽하단에 나타나는 아이콘을 선택해 해당 뷰에 속한 모든 constraint 제거
- 샘플 예제
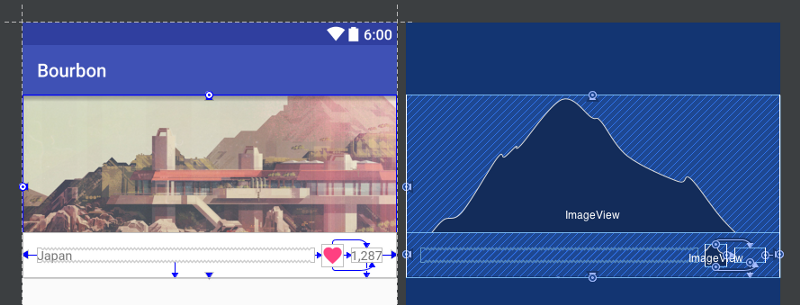


<?xml version="1.0" encoding="utf-8"?>
<android.support.constraint.ConstraintLayout xmlns:android="http://schemas.android.com/apk/res/android"
    xmlns:app="http://schemas.android.com/apk/res-auto"
    xmlns:tools="http://schemas.android.com/tools"
    android:id="@+id/constraintLayout"
    <!-- Other attributes -->
    >

    <ImageView
        android:id="@+id/image_shot"
        app:layout_constraintBottom_toBottomOf="@+id/constraintLayout"
        app:layout_constraintEnd_toEndOf="@+id/constraintLayout"
        app:layout_constraintStart_toStartOf="@+id/constraintLayout"
        app:layout_constraintTop_toTopOf="@+id/constraintLayout"
        <!-- Other attributes --> />

    <View
        android:layout_width="match_parent"
        android:layout_height="50dp"
        android:background="@color/white"
        app:layout_constraintBottom_toBottomOf="@+id/constraintLayout"
        app:layout_constraintEnd_toEndOf="@+id/constraintLayout"
        app:layout_constraintStart_toStartOf="@+id/constraintLayout"
        <!-- Other attributes --> />

    <TextView
        android:id="@+id/text_title"
        android:layout_width="0dp"
        android:layout_height="wrap_content"
        app:layout_constraintBottom_toBottomOf="@+id/constraintLayout"
        app:layout_constraintEnd_toStartOf="@+id/imageView"
        app:layout_constraintStart_toStartOf="@+id/constraintLayout"
        tools:text="Japan"
        <!-- Other attributes --> />

    <TextView
        android:id="@+id/text_like_count"
        app:layout_constraintBottom_toBottomOf="@+id/constraintLayout"
        app:layout_constraintEnd_toEndOf="@+id/constraintLayout"
        tools:text="1,287"
        <!-- Other attributes --> />

    <ImageView
        android:id="@+id/imageView"
        android:src="@drawable/ic_heart_accent_accent_24dp"
        app:layout_constraintBottom_toBottomOf="@+id/text_like_count"
        app:layout_constraintEnd_toStartOf="@+id/text_like_count"
        app:layout_constraintTop_toTopOf="@+id/text_like_count"
        <!-- Other attributes --> />

</android.support.constraint.ConstraintLayout>
Constraint Layout을 바로 체험해보고 싶으시다면 ConstraintLayout을 사용해 뷰 만들기 (Using ConstraintLayout to design your views)를 참고하세요!!
오토 밸류(AutoValue)
오토 밸류는 컴파일 타임 코드 생성기로 자바의 밸류타입 코드 생성을 대신해줍니다. 오토 밸류에 대해 이전 시리즈(오토 밸류 소개하기, 오토 밸류 자세히 살피기)를 소개해드린 적 있는데요, 이번에는 오토 밸류 익스텐션에 대해 소개해 드립니다.
- 익스텐션 종류
- auto-value-parcel: 안드로이드의
Parcelable인터페이스 구현 - auto-value-cursor: 안드로이드
Cursor객체를 통해 DB 값을 marshal/unmarshal 지원 - auto-value-redacted: 민감한 개인정보 등에 대해 redact속성 적용
- auto-value-moshi: Moshi JSON serialization 라이브러리로
JsonAdapter생성 - auto-value-gson: Google의 Gson Json serialization 라이브러리에 최적화된
TypeAdapter생성 - auto-value-with: 밸류 타입에 대한 약간의 차이만 있는 카피를 쉽게 구현 가능
- auto-value-parcel: 안드로이드의
- 오토밸류 익스텐션 작동하는 방식
오토밸류가 여러분의
abstract클래스를 구현해 패키지를 생성하는 것과 같이 오토밸류 익스텐션 또한 어떤 것을 생성할지 여러분의abstract클래스를 참조한 후, 하위 클래스를 통해 기능을 추가하게 됩니다.
오토밸류 익스텐션은 자바의 ServiceLoader API를 사용하므로 간단히buid.gradle에 디펜던시를 추가(maven에서는pom.xml)해서 사용할 수 있습니다. 오토 밸류가 사용가능한 익스텐션을 찾으면 익스텐션의applicable()메소드를 불러 각 클래스에 어떤 익스텐션이 적합할지 정하게 됩니다.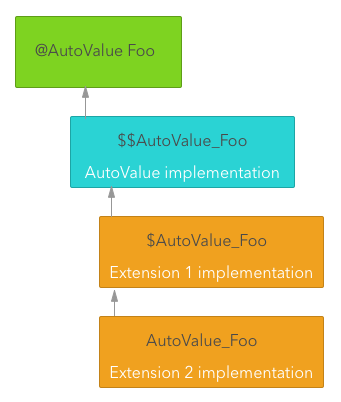 자세한 구현 방법은 AutoValue 익스텐션 자세히 알아보기 (AutoValue Extensions)에서 확인해주세요~
 자세한 구현 방법은
 오픈소스 라이브러리

더 읽을 거리
5월 다섯째 주의 기사를 Android Weekly 207 영어 원문에서 볼 수 있습니다.
지난 뉴스가 궁금하다면 아래 링크를 참고해 주세요.
- 주간 안드로이드 뉴스 #206 한글 요약
- 주간 안드로이드 뉴스 #205 한글 요약
- 주간 안드로이드 뉴스 #204 한글 요약
- 주간 안드로이드 뉴스 #203 한글 요약
- 주간 안드로이드 뉴스 #202 한글 요약
- 주간 안드로이드 뉴스 #201 한글 요약
- 주간 안드로이드 뉴스 #200 한글 요약
컨텐츠에 대하여
이 컨텐츠는 저자의 허가 하에 이곳에서 공유합니다.